Warning: Trying to access array offset on null in /home/guitkwzh/barpizzabarpizza.com/wp-content/plugins/envira-gallery/src/Frontend/Gallery_Markup/Base.php on line 437
Warning: Trying to access array offset on null in /home/guitkwzh/barpizzabarpizza.com/wp-content/plugins/envira-gallery/src/Frontend/Gallery_Markup/Base.php on line 438
A detailed guide on recreating an ultimate South Shore Style Bar Pizza from home, wood paneling not necessary.
Boston Bahh Pizza
Everybody should be able to make an authentic New England style bar pizza no matter their location. I’ve heard the horror stories of what’s out there for pizza outside of the Northeast and its not good. As a result most of the bar pizza joints around here have caught on and began selling frozen pizzas. But they just aren’t the same. Now, with everyone being stuck in their houses during the COVID-19 Pandemic, I’ve decided to create an entire website dedicated to making the ultimate homemade bar pizza from the comfort of your own sweatpants. It’s a work in progress but I’ll update as time fits.
I am a pizza fanatic. Bar pizza has run through my blood since my father first introduced me to ground linguica pizza at Cape Cod Cafe. As a hobby I’ve always enjoyed making pizza and had always wanted to figure out how I could replicate my favorite pizzas in my own kitchen. There are hundreds of dough recipe’s online and I’ve tried most of them. They where either too chewy, too cardboardy or unable to even stretch out in the pan. The dough recipe below is unlike any other I’ve found online and is the result of a lot of trial and error. It is easily stretched along the pan, tastes great, and is as close you will ever get to recreating a classic south shore bar pizza inside your own home kitchen.
World Famous Bar Pizza
Cape Cod Cafe, Lynwood Cafe, Town Spa, and Venus are just a few of the greats near me and they all have a slightly different flavor profile, crust texture and cheese mix. There is always plenty of debate over who is best. I love them all. They’re all good and they’re all slightly different. I think a lot of it comes down to nostalgia and consistency when people choose a favorite. These places have been making the exact same pizzas for over 40 years now.
What makes a bar pizza a bar pizza?
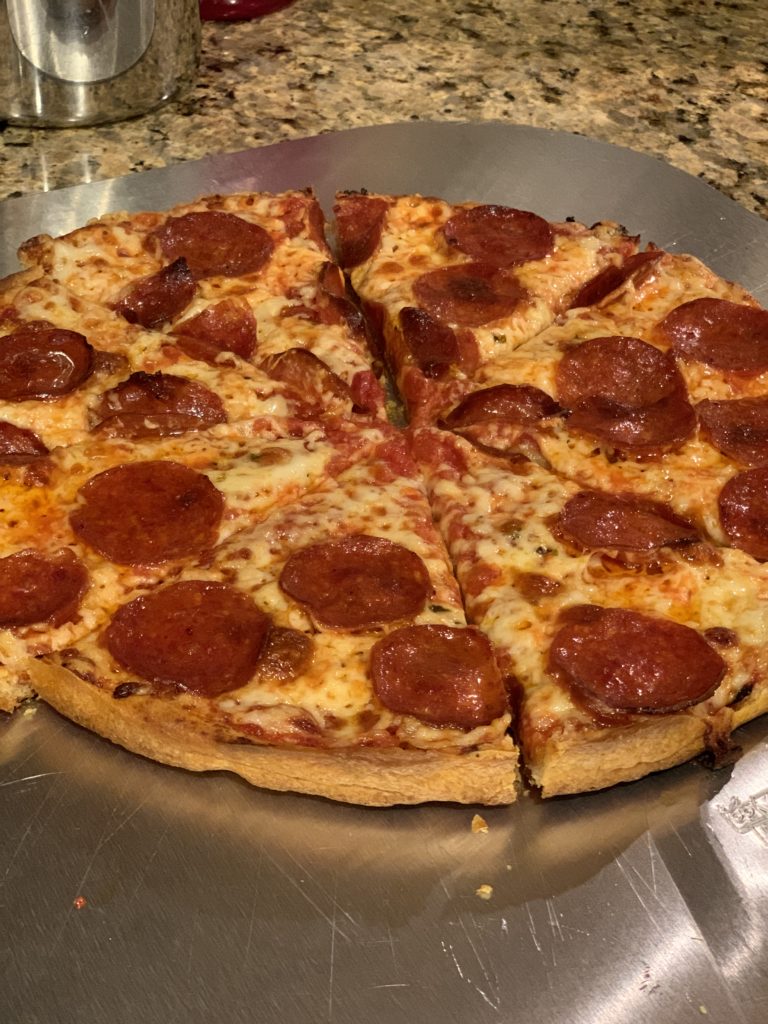
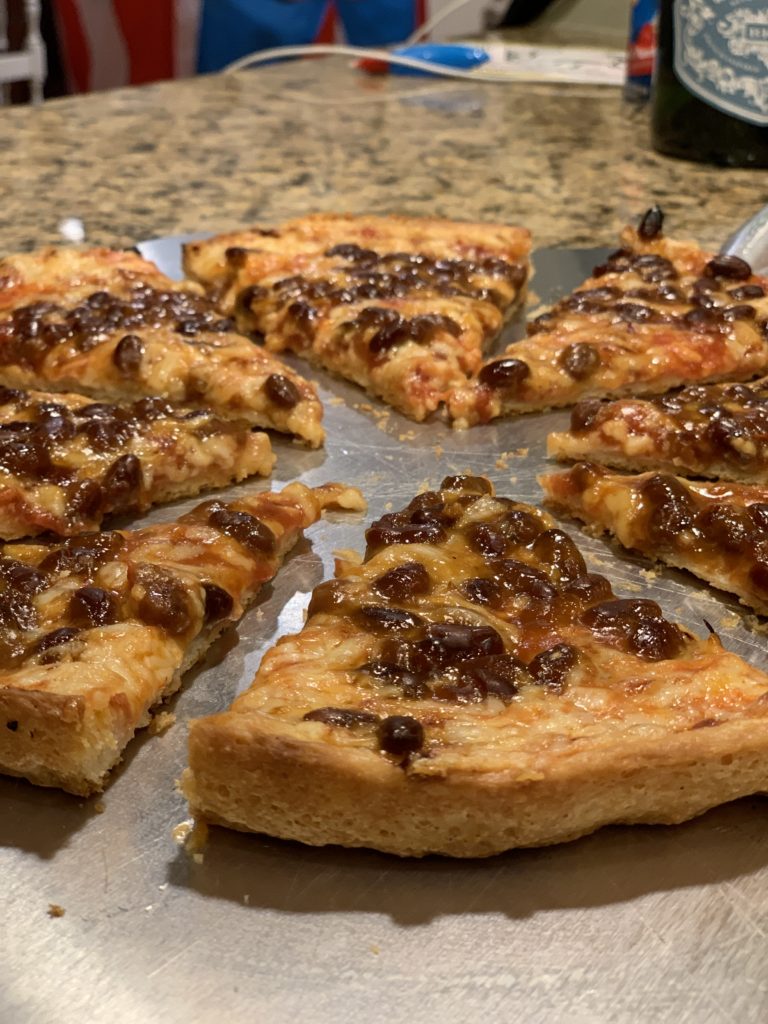
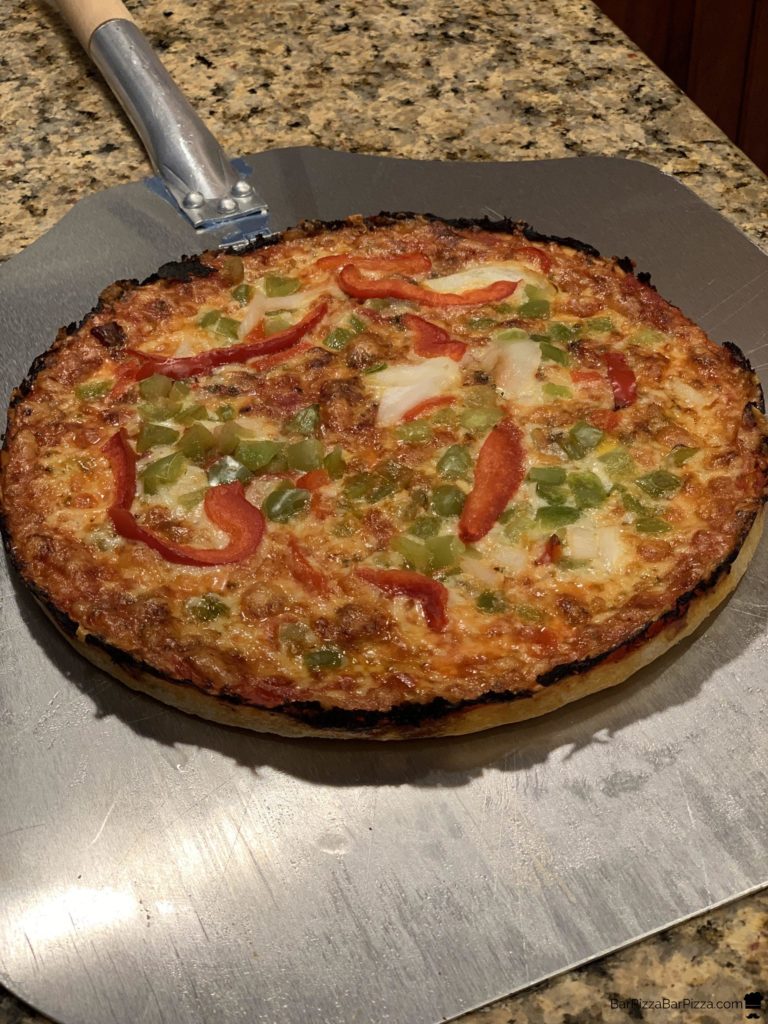
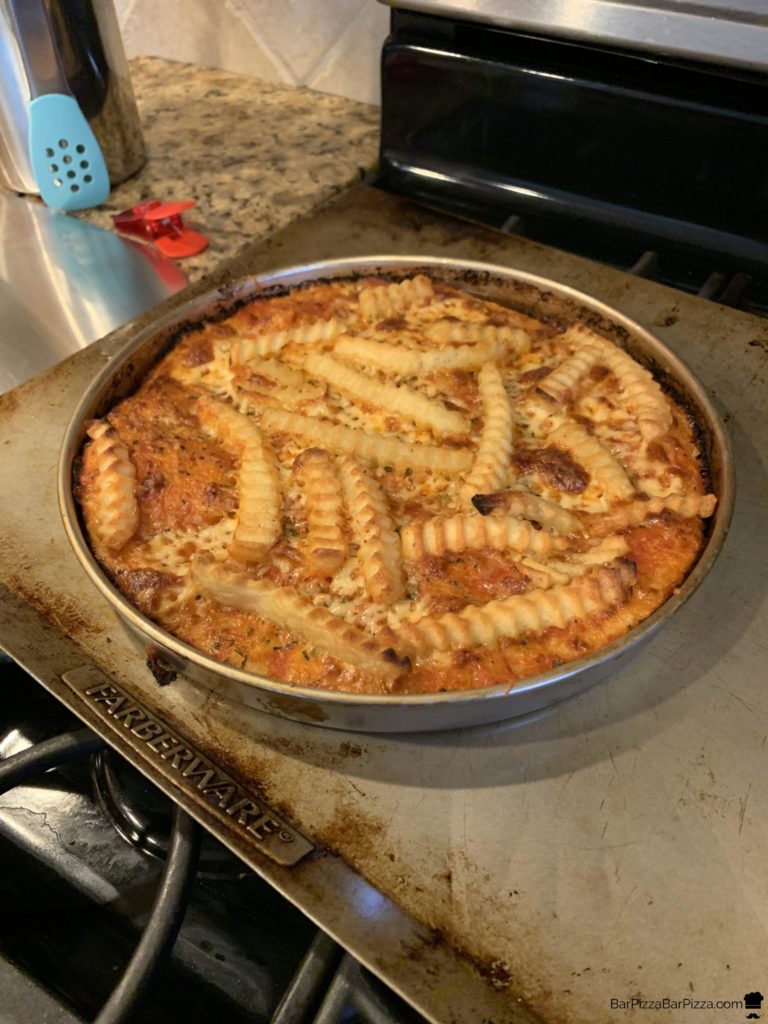
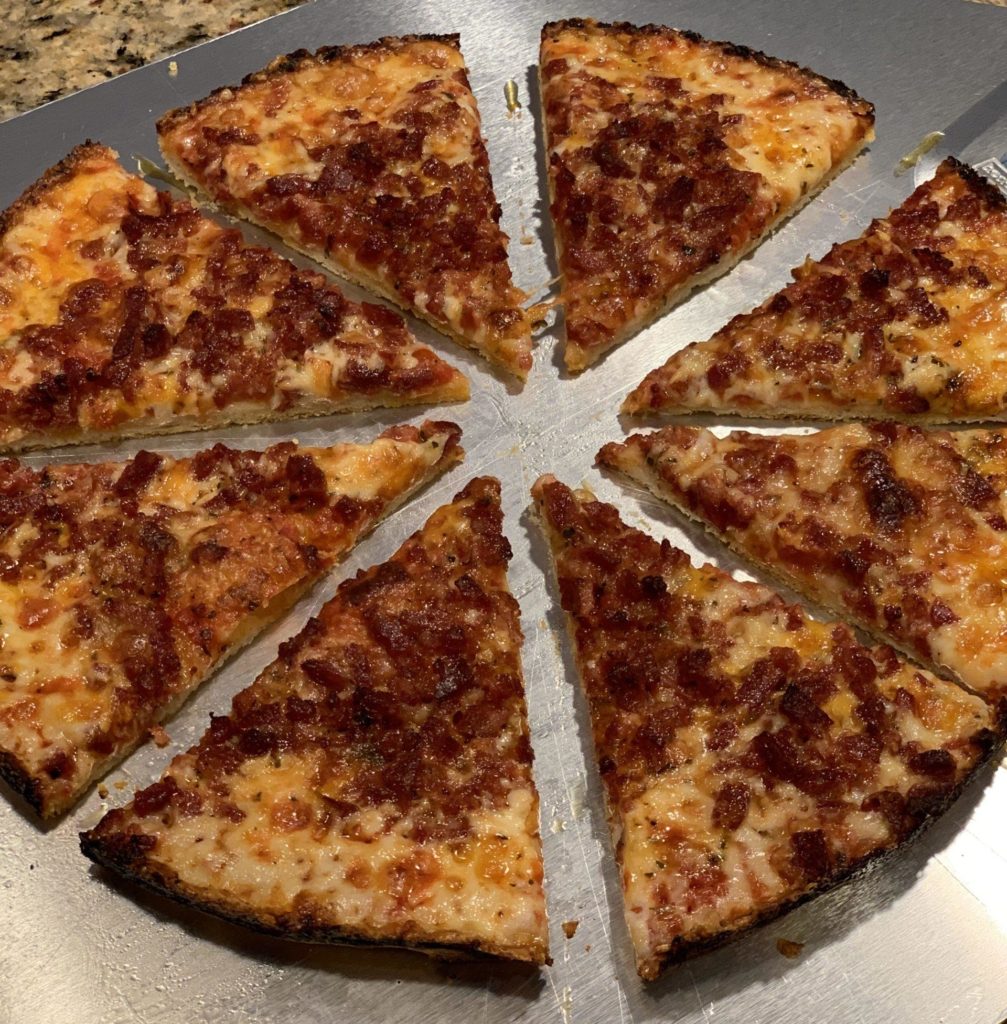
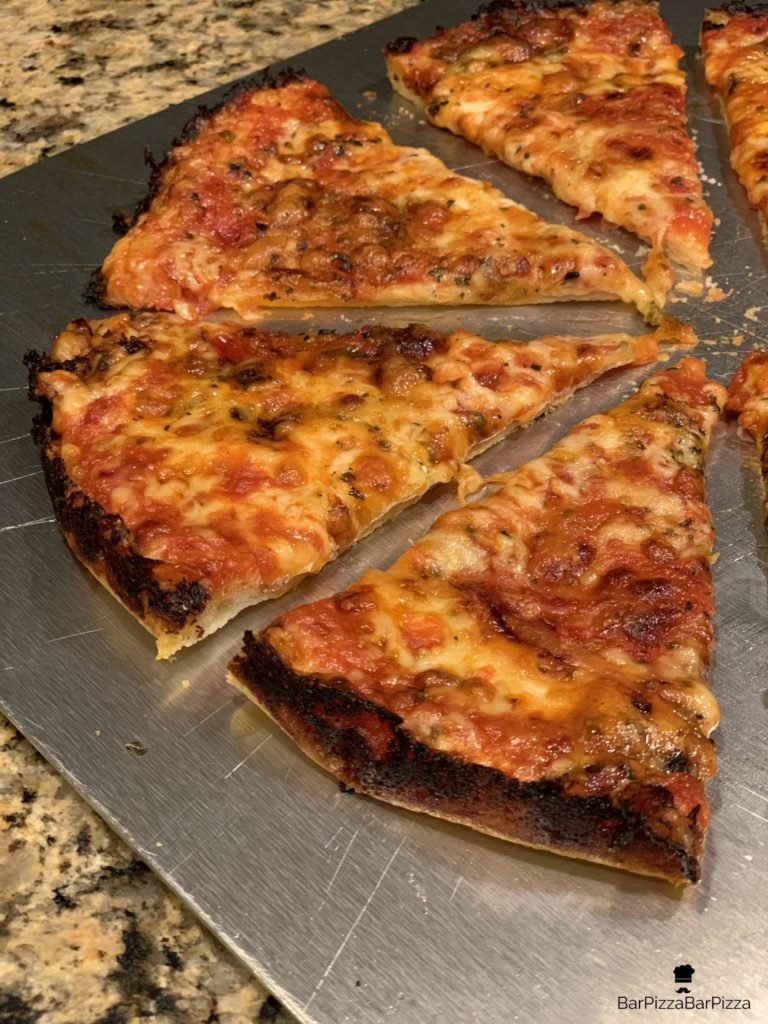
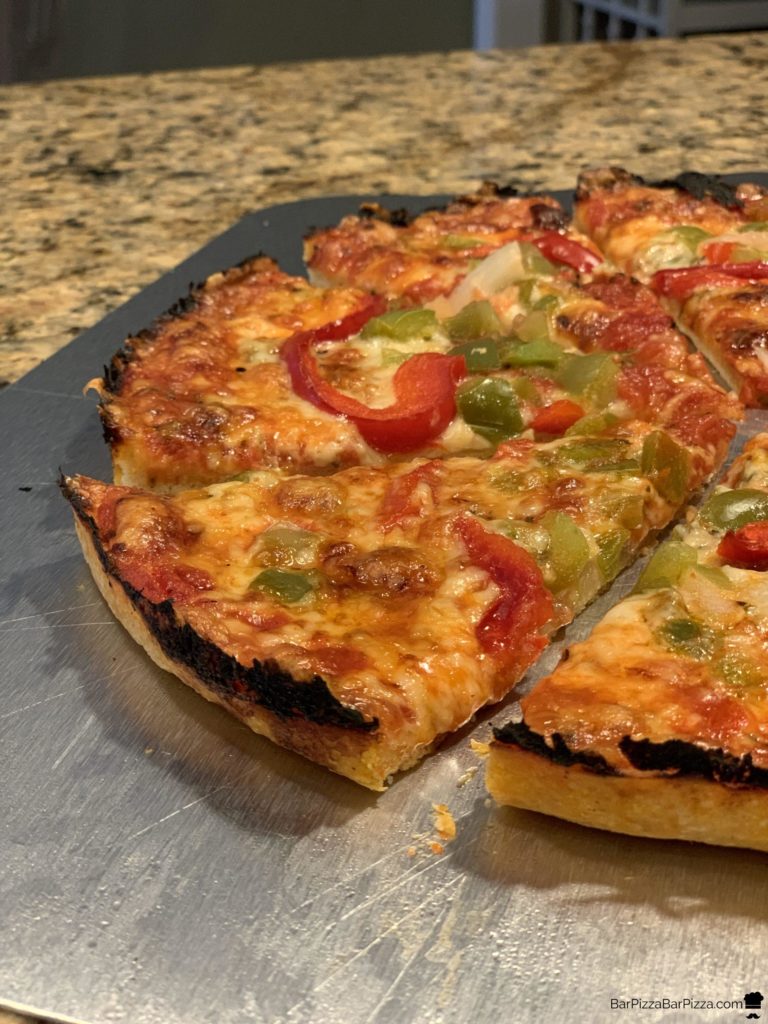
For starters, these pizzas are cooked in a well seasoned 10″ pan. A flaky buttery crust sits beneath a crushed tomato sauce. Topped with cheddar cheese and just about anything else you’d like to throw on top (like french fries, pickles or mozzarella sticks) you are in for a world of deliciousness. Pairs perfectly with an ice cold beer. The bars these pizzas come from usually have some sort of wood paneling on the inside, most haven’t updated since the 70’s and their take-out pizzas come in a brown bag with thick paper plates. It’s hard to find anything even remotely close to this style of pizza anywhere outside of the South Shore or Massachusetts.
The Dough
The trick to achieving that buttery crispy crust is adding Corn oil and melted butter, along with minimal kneading. Most recipes leave that out. Nothing ever compared to what I’d get at a local bar pizza joint until I tried this. For butter I prefer KerryGold Salted Butter
Also, most of the local pizza shops coat their pans with Cottonseed Oil, though it can sometimes be hard to find. I have coated my pans with corn, canola and olive oil all with good results but I prefer corn oil for the added flavor. At high temps the oil in the pan actually fries the dough while cooking.
Flour Selection
For a crisp, buttery, cracker like crust like The Lynwood I use All Purpose flour. For a slightly softer, chewier crust you can use bread flour. It’s a subtle difference and I encourage you to try both. This recipe is super easy and you can interchange All Purpose/Bread flour without changing any measurements.
Yeast
Don’t worry about what type of yeast you have on hand. You can interchange Active Dry for Instant Bread Machine yeast without changing any measurements. This is the yeast I have been using with great results. If you use the Instant bread machine yeast, just mix it right in with the dry ingredients. Then add the wet ingredients. The only difference between the active dry yeast and the instant yeast is the size. Instant yeast is much finer and will dissolve well mixed right into the dry ingredients.
The Hardware
If you’re going to be serious about creating authentic bar pizzas from your kitchen you are going to need a few important tools.
The Pan – The only pan I can recommend for making bar pizza at home are these 1×10 pre seasoned straight sided Lloyd Pans , they are great! These pans are best for home cooks because they are dark and heavy, helping spread heat evently. If you are using shiny pans you may have to adjust temperature and need a stone.
Once I started using Lloyd pans I no longer had to place the pizza back onto the stone or baking steel to crisp up the bottom. These work great on there own, no stone needed. Lloyd pans are a bit pricey but well worth it if you are serious about making amazing pizza at home.
**Just wipe them out with a paper towel when done cooking, do not wash with soap and water!
A pizza peel – These wooden ones
also work great as a nice serving tray.
Serving Trays – you can lay out the fancy paper on these too if you like
Pan Grippers – Work great for easily removing your pans from the oven. Also saves cabinet space compared to using a pizza peel.
Pizza Cutter – I prefer to use these blade style cutters but you can use a wheel cutter
too, just be careful because sometimes the wheels tend to push the cheese off. If you’re going all in, check out this sweet Pizza Knife
Cheese Grater – You 100% NEED to grate your own cheese if you want to make a great bar pizza. Store bought pre-shredded cheese is coated in cellulose, this prevents clumping. It can burn up and have a funny taste at high temps.
When it comes to cheese graters you have a few options here. You can go oldschool. Mechanical Rotary, or Electric Rotary.
I use a rotary cheese grater like this and it saves me a lot of time. There are also these electric cheese graters that work great. I love it! If you have a KitchenAid Stand Mixer this Slicer Attachment is awesome too.
Takeout boxes or Fiber Molded Plates – this may seem crazy, but if you’re going to save any of your pizza for a later time, it is based stored on a paper plate or takeout box. The paper actually absorbs some of the moisture preventing your pizza from becoming soggy. This is why all the greats still serve takeout on thick paper plates in brown paper bags! If you store your leftover slices in a plastic container you will get some condensation on the bottom. This will result in excess moisture on your crust!
Kitchen Scale – I use this to make sure each piece of dough is 6.5oz. Also a more accurate way to measure your flour.
Apron – Obviously you cannot cook without one of these aprons from iLoveBarPizza.com
A good measuring cup – I you don’t have a nice set of measuring cups I’d start here
Cooking thermometer – This will help you make sure the water is at 110 degrees. If you don’t have one don’t panic, run the water over your hand, you want it about as warm as you, if you no longer feel the water it is about your body temperature and that will work.
Fine Mesh Colander – To strain the extra water out of your crushed tomatoes.
Thin Spatula – this helps to peel the pizza out of the pan and not mess up the laced crust. This is just a good metal icing spatula. There are also “blender” and “jar” spatulas out there that work well.
Dough Cutter – these are nice for dividing up your dough, much better than using a knife which will rip and tear your dough
Dough Docker – this pokes even holes in your dough, yes you can also just use a fork but these are fun.
Storage Containers for dough – to store your dough
Oven Gloves – Makes it much easier to hold the pan while popping the cooked pizza out. When I used traditional oven mitts my thumbs would smoosh the pizza, nobody likes that..
Stand Mixer – for mixing batches of dough, the Kitchenaid seams to be the industry standard for home cooks
Bluetooth Speaker – For cooking music. I also like this one.
The Sauce
The sauce is incredibly simple. Pickup any good quality can of crushed tomatoes at the grocery store and some fine sea salt
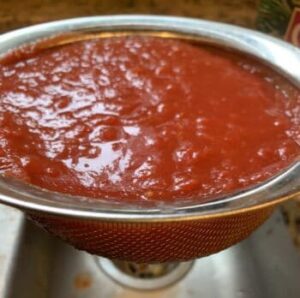
. Strain the majority of water out using a fine mesh colander. I use one like this. Place sauce in a bowl or container and stir in some sea salt to taste. That is all you need. You don’t even have to cook this sauce, it cooks on the pizza! My personal favorites are Pastene Ground Peeled Kitchen Ready Tomatoes (not the chunky kind) and Pastene California Pizza Sauce . After you’ve spread your sauce out on the dough, sprinkle on some dried oregano to taste. Don’t use cheap oregano it doesn’t taste good. As with everything else, use the best ingredients you can find.
**While fresh picked tomatoes may sound like a great idea, they are way too watery for a bar pizza.
Lynwood Sauce Update*
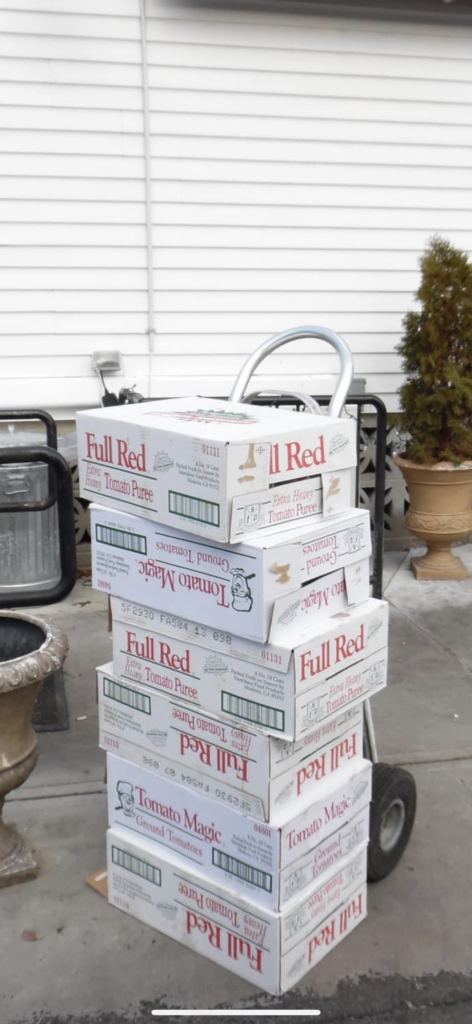
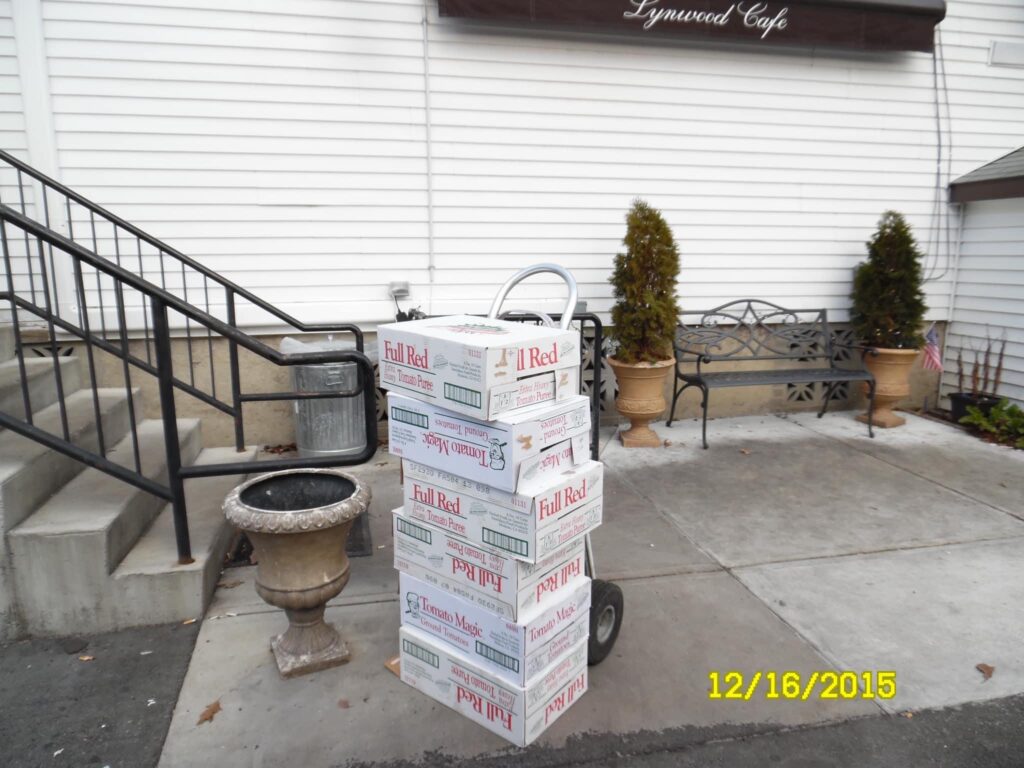
This picture surfaced on the South Shore Bar Pizza Social Club page..
Although I have not tried these myself this is obviously what Lynwood Cafe is using. Although we don’t know their blend ratio of puree/sauce I encourage some experimenting! You can order the Tomato Magic Ground Tomatoes and the Full Red Heavy Tomato Puree here on amazon! These are big cans so be ready to make a lot of pizza..
The Cheese
You are going to have to grate your own blocks of cheese. To achieve a quality bar pizza, pre-shredded cheese just isn’t going to cut it. Pre-shredded cheese is coated in cellulose which burns quicker and can start to taste funny when cooked at high temps. I shred down a block of good quality white cheddar and a block of low moisture mozzarela. Some of the classic bar pizza restaurants blend a sharp white and a mild white cheddar. Others like Lynwood will blend cheddar with mozzarella. White cheddar is the preferred choice here, not orange.
FAQ Troubleshooting guide:
Dough is snapping back and not spreading – This is usually because you’ve handled the dough a little too much. Let it rest in the pan for 15 minutes and try again. Start spreading the dough in the pan and let it rest periodicaly while the oven is pre-heating.
Burnt Bottom – move up one rack in your oven, also may have put too much oil in pan
Dough is too sticky – dough can be tricky because there are so many factors that can affect it like humidity, room temp, water temp etc.. If your dough is super sticky just add some more flour to it. It should be a slightly wet but not sticky ball of dough.
Big bubbles forming while cooking – you need to poke holes in the dough with a fork or Dough Docker before you sauce it
Dough not cooking on bottom – this is usually from using a light colored pan and not a dark pan, dark pans hold more heat and cook more evenly. Bright pans work great in high heat commercial ovens but can be difficult at home. Try using a Stone or Baking Steel if you are using bright pans
1 Serving Equals 1 Pizza for Recipe Below. Try the calculator to adjust recipe size. Recommended to use multiples of 4 (4,8,12 pizzas etc..)

South Shore Bar Pizza Recipe
Description
Homemade South Shore Bar Pizza
Ingredients
Instructions
Preparing the Dough
-
Dissolve the yeast and sugar in a separate bowl with the warm water and let sit until nice and foamy (couple minutes). The perfect temperature for the yeast is 110 degrees, don't go too hot or you risk killing the yeast. **Note - If you are using instant bread machine yeast. Just add it in with your dry ingredients, then add the wet ingredients and mix
-
Pour the flour into stand mixer (If you don't have a mixer just mix in a large bowl)
-
Pour the foamy yeast mixture in with the flour, start mixing on #2 with a bread hook, then add the corn oil, melted butter and salt. Mix with a bread hook until a ball forms. About 2 minutes Do not over knead this dough!
-
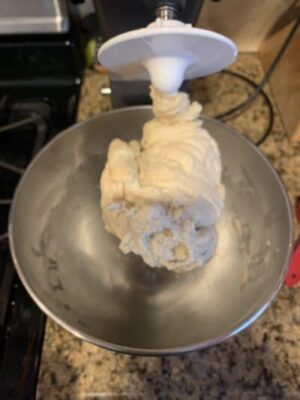
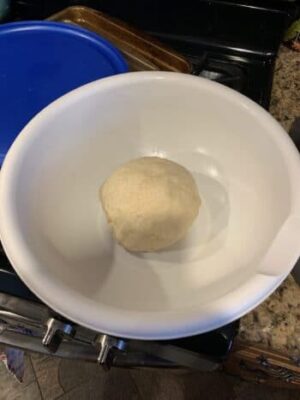
Set aside in an oiled airtight bowl, leave out at room temperature for at least 6 hours. When ready you should have a very light and fluffy dough that you can easily push to the sides of your 10" pan . Cut the dough into even pieces, you want about 6.5oz piece of dough for each (about the size of a baseball). Refrigerate whatever you will not be using for up to 48hrs. *Leave out of refrigerator at least 2 hours at room temp before reusing
-
Preheat oven at 500 for at least 20 minutes before cooking
The Sauce
-
Strain a can of high quality crushed tomatoes in mesh colander and add sea salt to taste. (I recommend Pastene California Pizza Sauce or Pastene Ground Peeled Tomatoes ) If you like a smoother texture you can throw it in a blender for a second. Some crushed tomatoes can come very chunky.
Assembling your pizza
-
Evenly coat your pan with some corn oil, make sure to coat the sides too
-
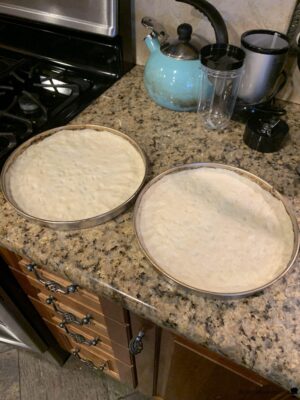
Begin to push your 6.5oz dough ball all the way to the edges of your pan. You may need to take a break to let dough rest, then continue spreading. If you want burnt/laced edges, keep the dough night and flat all the way to edge, you do not need to pinch a crust against the edges.
-
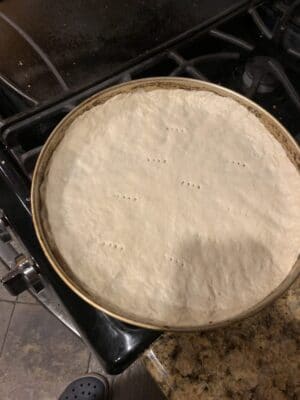
Poke a few holes in the dough with a fork, this prevents giant bubbles and its important! I have forgotten to do this, which resulted in one giant bubble sliding the cheese and sauce over the edge of pan and setting off smoke alarms...!
-
Spread sauce all the way to the edges to get those laced edges.
-
Dust sauce with some dried oregano, couple pinches should do.
-
Spread your shredded cheese all the way to the edges of the pan.
-
Add any toppings you like
Cooking instructions
-
**Preheat oven at 500 for at least 20 minutes before cooking. Place pizza in oven (Middle Rack) for about 12 minutes, add a few more minutes if you have a lot of toppings Every oven is a little different so you'll need to start watching the pizza around 12 min to see how it looks!
-
Eat pizza and save your leftovers for breakfast if needed. **Wipe your pans out with a paper towel and put them away, do not wash them!
Notes
For an even crispier crust, double the oil.
450 grams is about 3.75 cups
If dough seems dry and not forming ball in mixer add another tablespoon or two of water
Remember, every pizza can be a personal pizza if you try hard and believe in yourself!

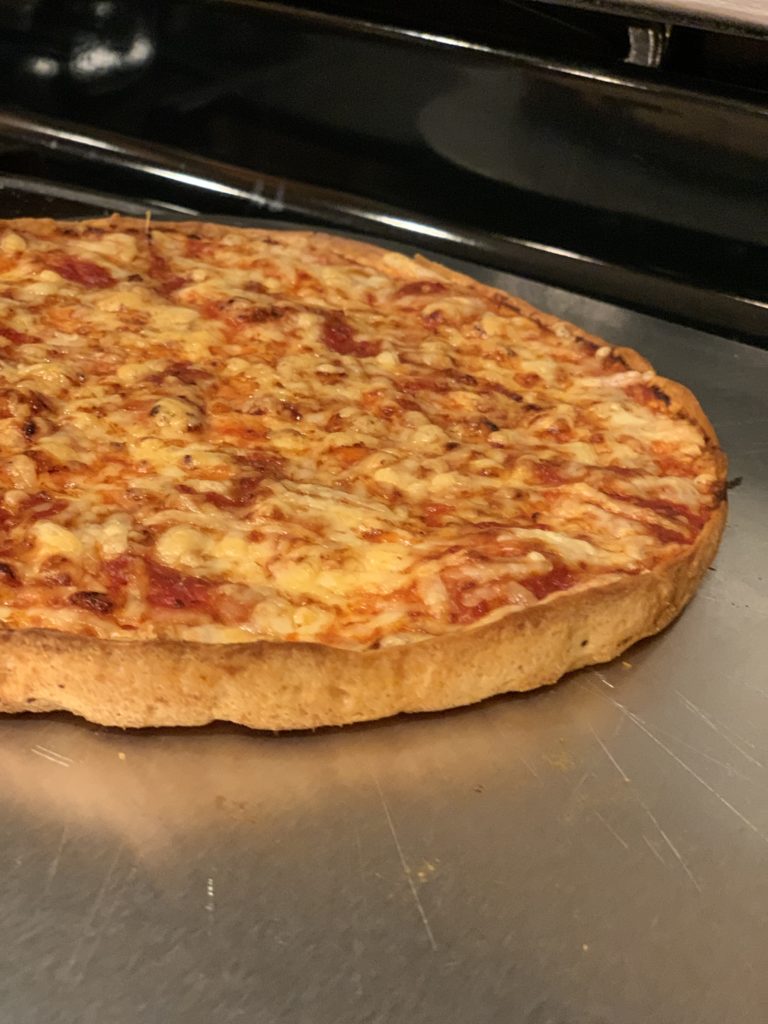
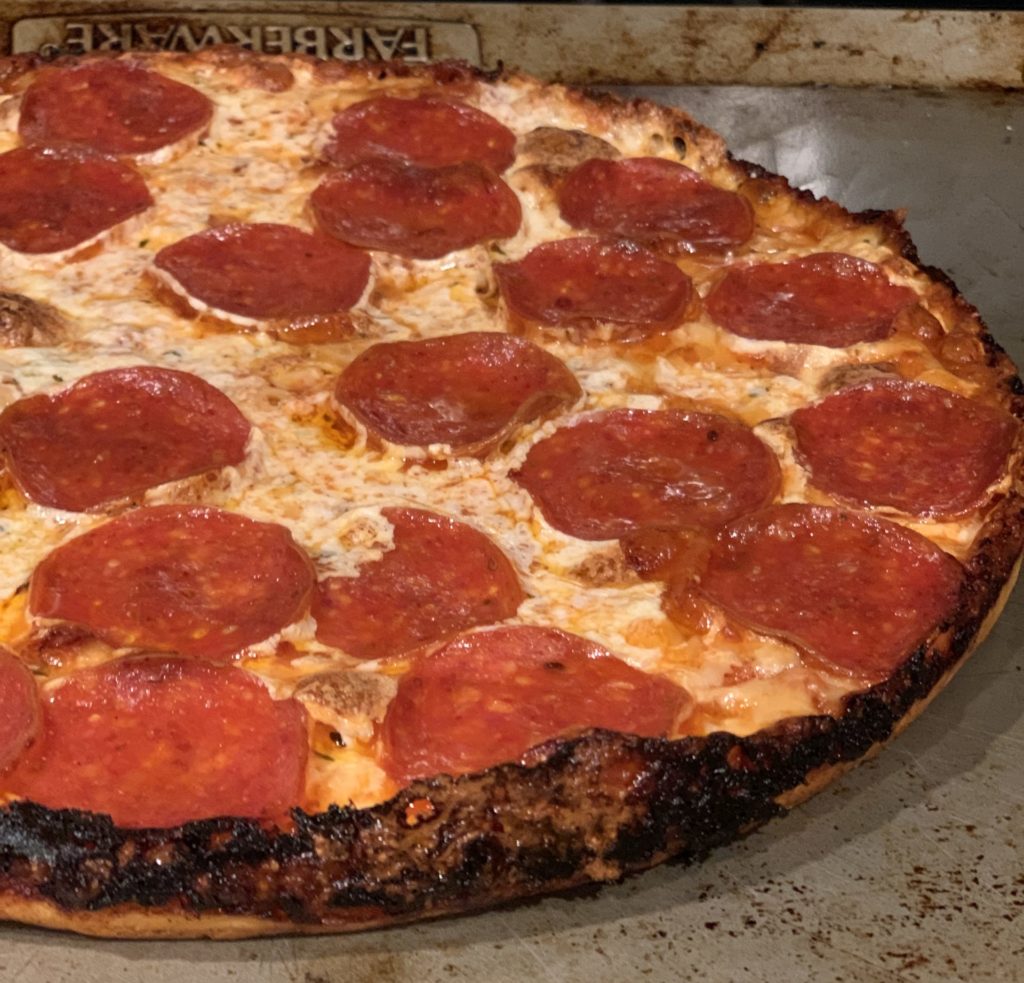
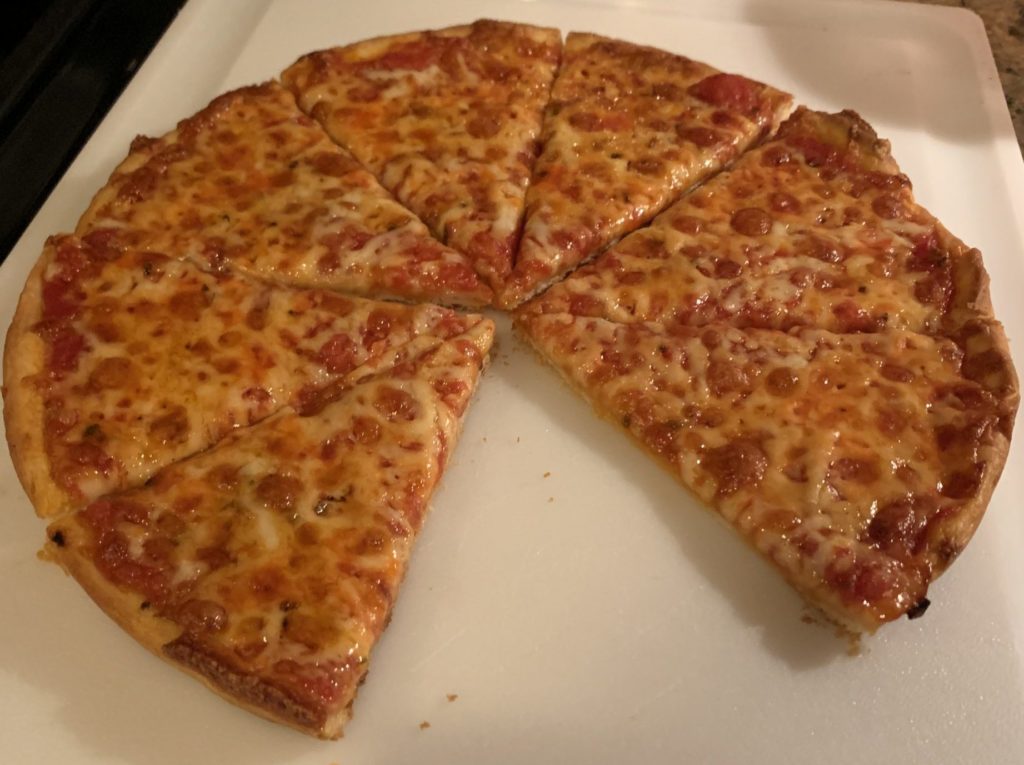
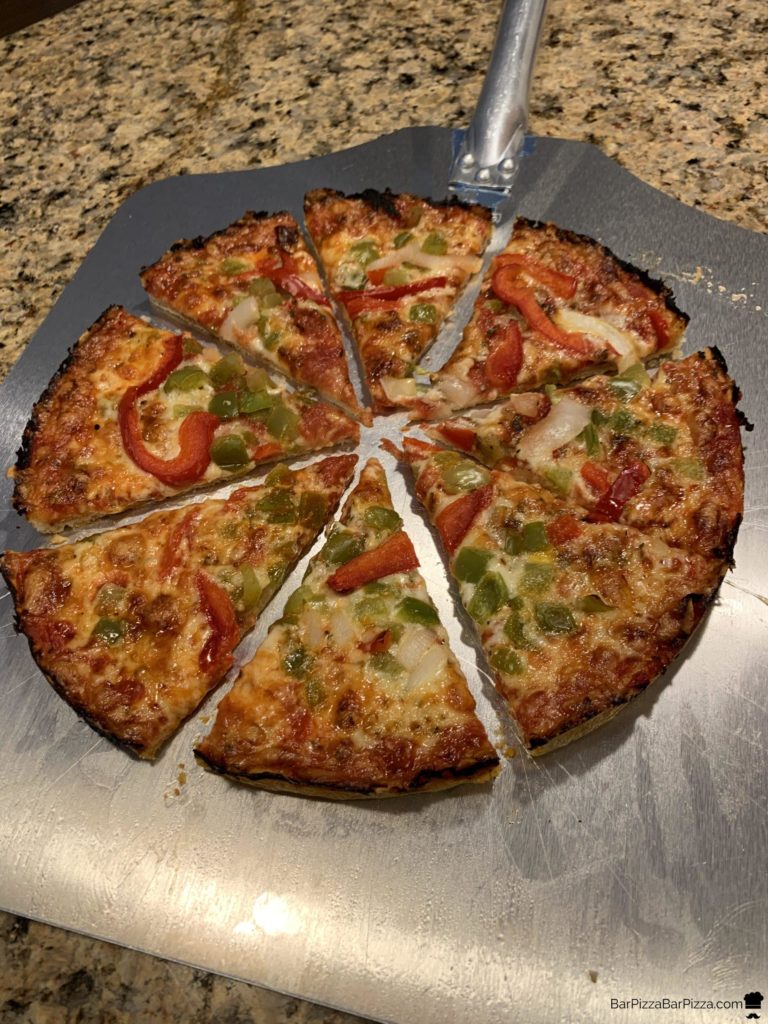
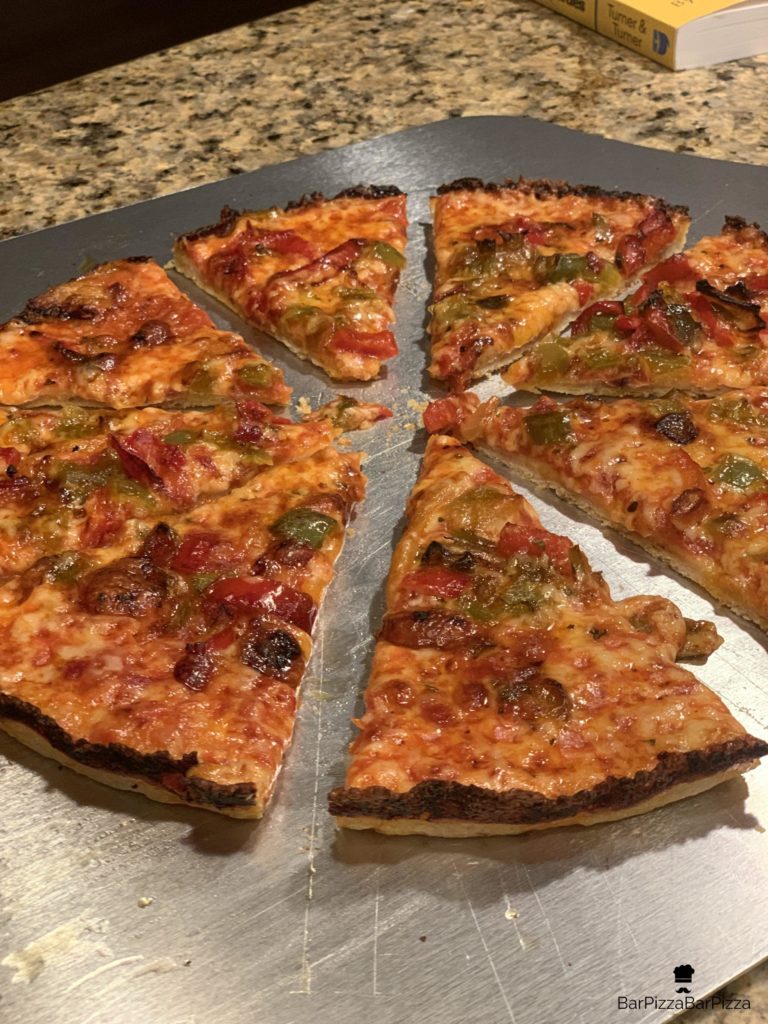
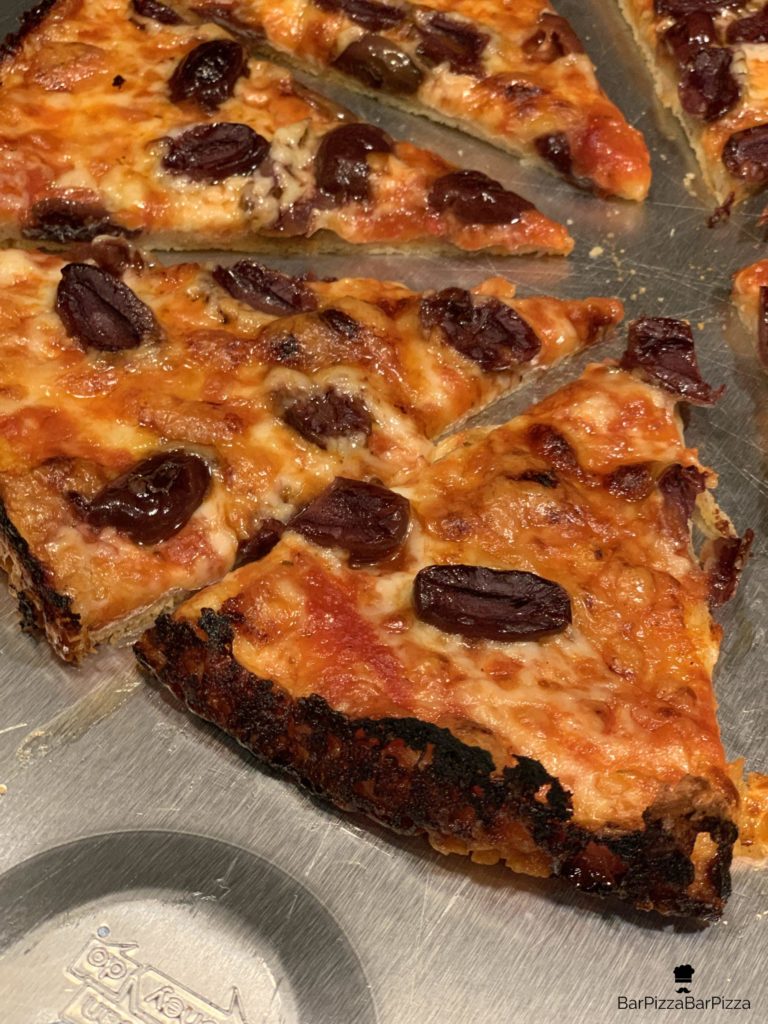
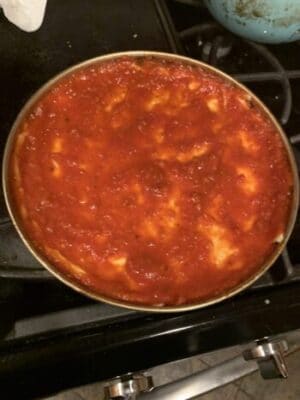
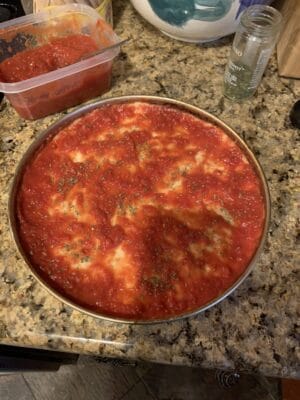


You were my first love, and now that I know you know how to make bar pizza, I’m coming back to reclaim you from lisa ❤️
I don’t even know except I came here from the South Shore Bar Pizza FB group and I’m going to claim you first over these two girls
Good stuff! I have a killer recipe for New York style pizza. I’m looking forward to getting into the Bar Pizza game. 👍
Wanna share your NY pizza dough recipe?
I don’t discriminate. Thanks JB
Jhbluhm@hotmail.com
Ooh! Could I get your NY pizza recipe? I’m trying to conquer all the styles I can manage.
Share that recipe here! Would love to try it
What is the best cheese ratio to use? How many cups of cheddar and how many cups of mozzarella?
70* cheddar/30* mozzarella
I find 16 Oz Cheddar to 8oz mozzarella is perfect.
Most likely 1/1 cheddar/mozz. Also, I have a feeling that you should only use cheddar around the edges. Like Detroit style, the oil from the cheddar will drop down the sides and give you thay extra crispy edge. I’d be curious to see if OP does this.
Actually, I changed my mind. I bet it’s 2/3 cheddar, 1/3 mozz. Maybe even 3/5 cheddar.
What’s your killer NY pizza recipe?
Well bring it on… would love to try it🙏
Can you share those killer recipes
Could you please email me your recipe for your “killer NY pizza”
Janelle1004@gmail.com
Do you share? I have been looking a good NY pizza crust recipe!
Yay Johnny! 🍕🤤
HI – Your pizza looks great. Thanks for the recipe. Just a heads up. On my PC in the dough recipe, only the top 4 items adjust/calculate when changing the number of pizzas. Starting with the • 1 and 1/8 cups Warm Water (110 Degrees ) down they stay the same. Thanks again for your efforts!!
Thanks, they all work on iPhone. Will look into it!
This sounds like it would make far more than 4-6.5 oz dough balls? Sounds more like 8? What can be used in place of corn oil? Thanks you
Check the servings on recipe. You can change the amount. I did 1 serving = 1 pizza.
I’m still experimenting with other oils because sometimes corn oil is hard to find. I’ve tried canola and it was good. Olive oil was kind of gross and too heavy.
I understand this is four servings and you can change the servings. It just sounded to me like that would make more than four pieces of dough but I guess not. LOL… Thank you… Maybe I will try a little bit of light olive oil and some butter. I have canola, extra virgin olive, and extra light olive here. The extra light olive is for baking and frying. Thank you for answering so quickly
Have you tried Crisco shortening?
Olive oil works great. This recipe just makes 4 pizzas
Seems to me that 6.5 oz is too small for a 10″ pie pan
8oz is what you want
This is awesome. Thank you for your work and all of the detail. If I can get the ingredients, I’m going for it tomorrow. In your rookie days of experimenting, did you ever use a cast iron pan? That’s all I’ve got for now, until I chase down a proper, seasoned, 10″ pan and enter the big leagues…
I never used a cast iron pan but I’m sure it will come out great with the even heat distribution. Just oil it good and don’t push your crust up too high!
Is meant by laced edges?
I keep seeing this term one the Facebook page.
Is meant by laced edges?
I keep seeing this term one the Facebook page.
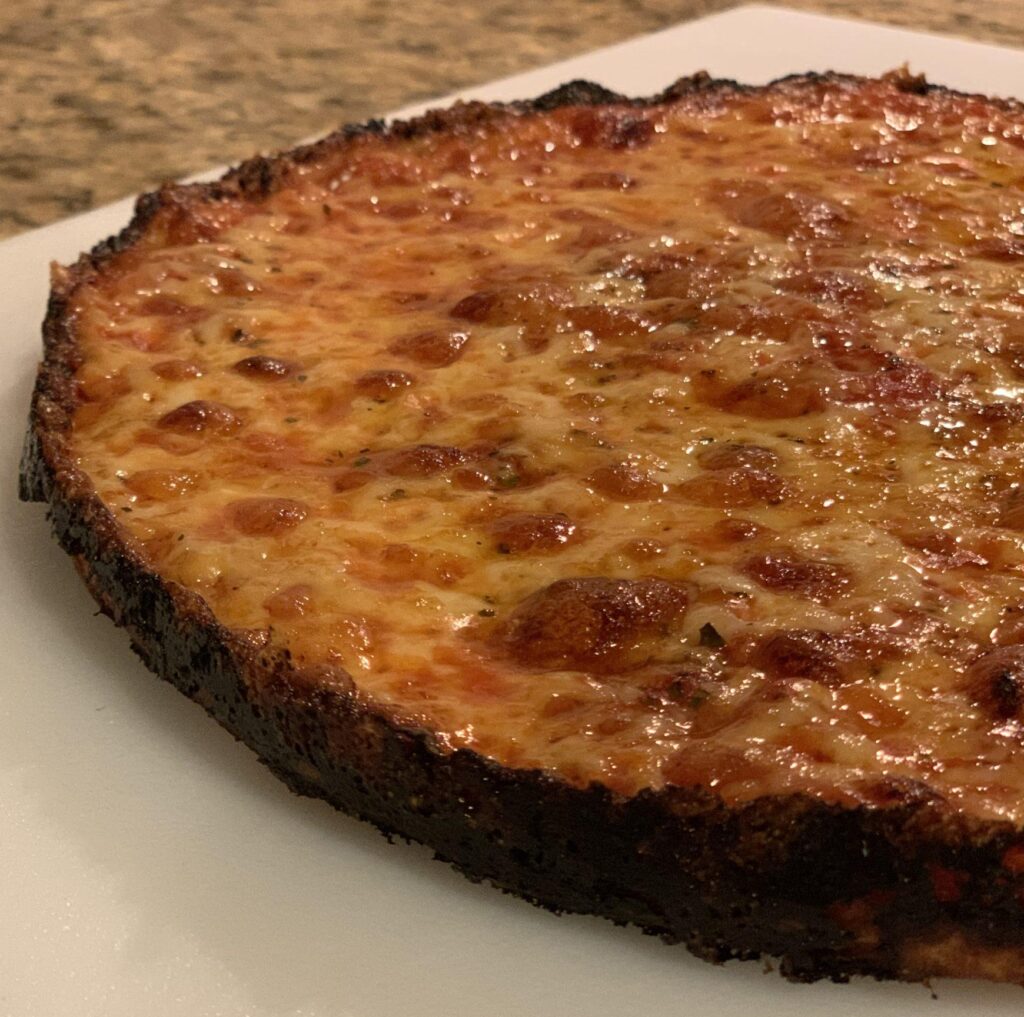
It’s when the sauce and cheese caramelize to the edge of pan creating that black burnt looking crust. Looks like a black “lace” around your pizza
Nice work brother
I’m confused. If I have the instant yeast and I add it directly to the flour and it says to skip the first step… do I still use the water (and sugar) or am I making the dough with only instant yeast, flour, salt, oil and butter?
You still use the water and sugar. I just meant that you don’t have to proof it separately in a bowl.
I’m sorry one more question… Step 4 says a airtight bowl and cover with a towel, what do you mean airtight? Like cover a bowl with saranwrap and then place a towel over that?
Ya, just don’t want air to get at it or else it will get crusty. Good luck!
I made the recipe for dough for 8 servings today. The dough came out very sticky. When I would handle the dough it would stick to my hands. I’ve used other dough recipes and haven’t had this issue. I used extra flour when I separated it for the different pizzas to help with handling. It was very easy to push into the pan and the finished product tasted good. It just seemed the recipe needed a lot more flour or less liquid. Is that normal for this recipe.
It should not be super sticky like that. Depending on the brand and type of flour you use you may need to adjust a little bit. Dough can be tricky. There’s just so many variables with dough like room temp, humidity, flour brand, rise time etc. I’ve also had it happen to me before, I just added a little more flour. Glad you liked it! I still think the is the best bar pizza recipe out there and I make it weekly! Enjoy!
Thank you for your quick reply. We did like the flavor a lot. I ended up using olive oil because that’s what we had in the house and liked the flavor. The other choice was Avocado oil. Easy enough fix with the addition of flour. I do like the recipes that give weight for the flour rather than cups and the calculator is pretty cool.
It should be tacky, but not sticky. Tacky in that yes it’ll adhere some to your hand. But if it pulls up off the bench or pizza pan, that’s sticky. Could be the type of flour you used (AP or bread flour?, what did you use?).
I received your recipe, Lloyd pans, all the hardware, cheese grater etc for Mothers Day. Cant wait to try tomorrow! Thank you so much for your research ,
Really appreciate you sharing this blog.Really looking forward to read more. Awesome.
I did live in Campello–the pizza hub of Brockton, at least it was to me. My pans are 30-40 yrs old, well seasoned pans and my Kitchenaid is 40+. I generally use olive oil in the dough. I use a cheddar cheese and may mix in mozz, parm or whatever other cheese is laying around and add pepperoncini or pepperoni. I am happy to learn how to do that cheesy edge because that is the one thing that was lacking. I shared this with other Brocktonians, who live out of state and cannot get Cod pizzas. Thank you.
Hi Jean I used to work at Capeway Manor when I was in High Skool- you probably remember that place? We would get Cape Cod Pizza after work and just loved it- I saw this recipe and am going to try it- just love the burnt edes and cheesy top! Nostalgia at its best! Living in Annapolis MD now and nothing comes close here- some NY style spots but far and few between. Thanks Boston John
Hi Boston John
I also worked at Capeway Manor, small world!! I was a waitress. I was working there the time a woman came in and shot her husband dead at the bar. Anyway, I use this pizza recipe every Friday for my family, and they love it. Cape Cod pizza has a few stores now. Raynham, Bridgewater, and Halifax.
I want to make a large batch of dough balls and freeze them to have around for later. Have you tried that? At which stage should I freeze the dough? Before it rests for 6 hrs or after?
After the bulk rise period. I have never done it myself but a friend of mine has frozen the dough and said it was still good. Just give it plenty of time to get back to room temp before using it again. If it snaps back just stretch it a little at a time every 10 min or so when preheating oven.
Awesome thanks for the tips. I’ll give it a try!
I’m trying to convert the 425g flour for 4 servings recipe into cups or oz and get very different numbers online. Anywhere from 2-3.3 cups. What is your conversions? My yeast packet says use only 2-1/4 cups flour to 2.25tsp yeast
This is KEY, thanks for suggesting that. I see lots of people concerned because their first go ‘round, the dough kept snapping back – patience, pizza makers, patience. 🙂
I’ve been making blather bathed of 12-20 pizzas worth of dough at a time. After bill rise i shape my individual doughs and pop them in the fridge over night to get some more flavor in the dough, then freeze. I pull from freezer a few hours before using them and it’s been working amazing for me. I’ve had pizza dough ready to go in my freezer for months using this recipe. Highly recommend making extra and freezing. Just wrap well to avoid skin
I really enjoyed this post! I have a blog myself, if you are open, I might curate this post to my audience. Obviously give a link back.
Thanks for the dough recipe. I’ve made it twice and both times it came out well, though each time I’ve only ended up with 6oz per serving when making a batch of 4. Not complaining though, I thought the dough would be the hardest to replicate and this recipe made it easy. Thanks again!
This has happened to me before too, I usually make 4 or 8 pizzas and 1 would end up a little short. I think it has to do with whatever brand flour you are using, your rise times, room temp, making sure the water was just right for the yeast etc..? Just add a little more flour next time. Dough can be tricky but I’m glad this helped!
Hi there! I could have sworn I’ve been to this web site before but after browsing through a few of the posts I realized it’s new to me. Nonetheless, I’m definitely pleased I stumbled upon it and I’ll be book-marking it and checking back regularly!
Awesome .Thanks for the recipe.
This recipe and tutorial has been excellent!
Quick question, been using 10″ cast iron pans as the Lloyds were sold out months back and they have been excellent. Sort of went overboard and now have 4 total to accommodate Pizza night for my family. Given the investment for the cast irons, is it really worth it to buy Lloyd’s pans now that they are back in stock?
If your pizzas have been coming out good and not sticking or anything I wouldn’t bother
Thanks for putting this together. I’ve shared this site with a ton of friends. All my pizzas have been coming out great with your recipe. I’ve found that I need about 7oz of dough to spread in the pan, just a bit easier to spread and still really thin and crisp. I bought my pans from Bay State Restaurant Products in Brockton, place is awesome and I have no connection to ownership. Didn’t require any seasoning and they are crisp right out of the pan. This has been great for the family, can’t thank you enough.
Awesome thanks for sharing!
oil the pan with a high smoke point oil — i’ve seen people use cottonseed, I used grapeseed and it’s terrific. The corn oil in the dough with the butter mix is for the taste and the texture, but corn oil has a bit lower smoke point and will cause the pan to stick a bit quicker than you want. Also, you need to play with your temp. on the oven — mine at 500 was a bit hot for and moved up the grill/shelf by one notch. Either way, this is a great recipe and is the closest I’ve come to the real thing.
Sounds great! Going to make this weekend! Thanks for the recipe!
Hi there! Someone in my Myspace group shared this site with us so
I came to take a look. I’m definitely enjoying the information. I’m book-marking and will be tweeting this to my followers!
Outstanding blog and superb design and style.
My space! 😂
Has anyone used this recipe with pastry flour? I have a bag I’m looking to use up.
Pastry flour won’t work well-not enough gluten
exactly why would I cover an airtight bowl with a towel? Sure this is just a play on words, but please explain.
I said that incase someone is using a clear/glass airtight bowl. I believe the dough is happiest in the dark, where it can go on it’s journey to Flavortown in peace, without any outside light to distract it. Enjoy!
Thank you! This is truly the best homemade pizza ever! Since we moved from Boston to Raleigh 10 years ago, we have been searching, without any success, for a great pizza. The search is now over, as I just make this at home!
How much cheese do you use per pizza- I don’t see that anywhere? A matter of personal taste?
That’s entirely up to you! Some people like extra chz, some very little, Just make sure you spread it all the way to the very edge of the pan.
Not sure if I missed this, but where in the oven should the shelf be placed to bake the pizza? Middle, bottom or top? Or does it even matter?
Bottom rack! Sorry if I didn’t mention that I’ll update site later!
I take that back, i just looked in my oven, I’ve been using the middle rack! Again, with almost every oven cooking things differently you may have to experiment!
Thanks so much for this excellent piece which was invaluable in helping us make our first bar pies last evening; one each Sautéed Mushroom, Broccoli, and Caramelized Onion. They came out pretty well for a first try. I purchased 2 pans from Bay State Restaurant. The dough recipe, which I made for 4, actually was enough for only 3; not sure why this was. I used vegetable oil as we did not have corn oil. Thank you, again. We’ll make more soon!
Awesome info! Can I cut these ingredients in half to make 2 pizzas?
Dave,
Make the regular recipe, make 2 pies and freeze the other individually in plastic wrap. Take them out the next time you want to pies around noon to let thaw in a warm place in the kitchen and you can start making your pies for dinner.
disregard this comment. just noticed i can change the number of pizzas.
Awesome info! Thanks for sharing your details and insight! 2 questions…
1) any suggestions on what type of pepperoni topping to buy? Looking for best flavor and cupping. Do u buy a stick and slice it yourself?
2) what’s the definition of lacing and what are the techniques to achieve it?
THANK YOU! I just finished my second bah pizza of the day. I grew up in Brockton and really miss the Cape Cod Cafe, Christo’s, Tip Top Cafe (RIP), Town Spa, Home Cafe, Brockton Cafe, etc. I’m retired and living in Florida now and don’t get back there any more. Thanks to your post I ordered a Lloyds pan from Amazon, got pre-made dough, corn oil, sauce, and cheddar cheese from Wal-Mart and today i followed your instructions and now I feel like I just got home from one of those cafes.
The picture shows a Baking Steel in the oven which is made there in Cohasset by bakingsteel.com – they really help crisp up the bottom with the pizza pan right on the steel
Yes! It was needed before I started using the dark non-stick Lloyds pans. BakingSteel is also great for other styles of pizzas, love it.
Hubby made this last night. We only got 2 pizzas out of recipe that says 4 servings. Dough was quite sticky. Let dough sit in bowl for 6 hours. Heat in house at 70 °. The 2 pizzas were amazing!! I have just ordered a kitchen scale. He used 1.9 cups of flour . He eyeballed the .9 cup. Any ideas why we only got 2 crusts out of recipe?
You definitely did not use enough flour. 450g of flour is a little more than 3.5 cups. Check out one of the kitchen scales that I linked to above! Thanks!
Came across your recipe, going to give it a shot soo……I have a question about your dough, I notice you have melted butter and corn oil. In the recipe directions, you got instructions to put melted butter and corn oil in the dough. I am thinking that the corn oil is for the pan only….thanks.
Put both corn oil and melted butter in the dough, also use some corn oil to grease the pan. Have fun!
never mind….I read the recipe again……its clear to me now. Let you know later of my results.
Earlier in the comments, you mention using a baking steel. I don’t have one. Would it be best if I put the pan just on the bare oven racks, or should I use my pizza stone?
Before I was using the Lloyds pans I needed to use the baking steel for the addition heat. Brighter pans need more heat. If you are using the dark non stick Lloyds pans recommended then no stone or steel is needed!
Great recipe! I grew up in the south shore and now live in CA. I always love to go back and, after seeing family and friends, have some great bar pizza. Just tried your recipe and it is spot one. Came out perfect. If you know a Chinese chicken finger recipe (and Scorpion Bowl) let me know. lol. thanks a lot for posting this.
Do you have a cheddar cheese preference? I read in your recipe that some places use a mix of mild and sharp but if I’m just using one, do you recommend mild, medium, or sharp?
No preference really, as of lately it’s just whatever is available at the store. Usually a Wisconsin white cheddar cheese.
Having worked in a Brockton restaurant back in the 70’s we used Wisconsin Cheddar exclusively. It was delivered in 50lb blocks and we grated it with an attachment on the Hobart mixer. We were a neighbor to Christo’s. If we ran low on cheese we would borrow some from them. From time to time I used to make the dough as well. No olive oil, vegetable. Salt, water, sugar, and yeast. No butter. I was told that most of places in Brockton went by the same recipe. Can’t say for sure. As far as the sauce went. We used Redpack tomatoes. I never made the sauce but I assume there was possibly oregano, basil, and garlic powder. The sauce was not cooked.
My dad worked at Brockton Hospital and we always went to Christo’s. Best pizza ever. The gold room was something else. As a kid I thought it was the fanciest restaurant in the world.
I wonder if your dad knew my father-in-law, Dr. Musante? He worked at the Brockton hospital, too.
I lived in Randolph for a few years back in the 90s and quickly fell in love with the Lynewood. I miss it! SO MUCH crappy pizza spread over our great country. Why is it so hard to find a good pizza? Anyway, thanks for sharing this recipe. Looks like this is what my family will be doing for Christmas dinner!
Dave,
Make the regular recipe, make 2 pies and freeze the other 2 individually in plastic wrap. Take them out the next time you want to pies around noon to let thaw in a warm place in the kitchen and you can start making your pies for dinner.
Butter in the dough, why didn’t I think of that? I add a pinch of sugar and a dash of olive oil to my sauce, other than that, pretty close.
My Lloyd pans are supposedly on their way from Amazon today so I just made a batch of your dough and it’s resting nicely and doing it’s thing in the warmest room in the house. I need to get some canned tomatoes before dinner. I hope this comes out, I’ve been making pizzas with Naan bread all pandemic and while they are good, it’s not the same. We are 5 min from Lynnwood but I’ve always wanted to try my own pizza. I’ll follow up later. Thanks and I really love how responsive you are to comments/questions.
UPDATE: wow that came out so good! So happy I found this website.
The dough came out perfect. My conversion of grams to cups was off so I just kept adding flour until I got the right consistency. Think it’s closer to 3 cups. I grated the cheddar and mozzarella but found the mozzarella burned quickly the first time around so I cooked with the cheddar for 8-9 minutes, then added the mozzarella for the final 5. Tastes like the old Town Spa pizza to me, before they moved to the new spot. Thanks for putting this recipe out there!
A bit late to the party but tried this today and it was sensational. Used olive oil and cooked it in a paella pan in my GMG pellet grill at 500°. Cooked in ten minutes. Definitely on goes on my keeper list.
Have you ever tried to cook this pizza on a grille, with or without a stone? I have a webber gas grille, and when it is warmer out we use it to cook pizza and like the smoky flavor cooking directly on the grille. We just use store bought dough or homemade. We can certainly try it with pans.
I have not tried grilling using this recipe but I have heard that the frozen Cape Cod Cafe and Emma’s Pizzas come out awesome on the grill!
I’m going to make these in the grill tailgating for the game Sunday night. Did you do it? How did it come out and did you do it directly in the grill or on a stone? I was trying to decide the same thing!
This was fantastic. Took a couple try’s to get the hang of it, but once you figure it out it’s easy and delicious.
A kitchen scale is key in measuring out 6.5oz dough balls to fill the pans, 6.5oz is probably smaller than you think, and you need to stretch this dough thin (it’ll rise a little more in oven) for it to come out like a true bar pizza. I also use a bit more oil in both the dough and in the bottom of the pan.
Typically closer to 14 minutes for me with a non convection oven, somewhere between 12-14 when the cheese looks right, and if bottom is too pale I’ll crisp up for 60-90 seconds on a preheated baking steel.
I do dress up the sauce a little bit (oregano, garlic, basil) and I also let it simmer on the stove top for 15-20 minutes.
Enjoy!
[…] The Recipe […]
Great recipe!
Thank you! We moved away from the south shore a few years ago and havn’t been able to find any good pizza here in Florida. We used to get Town Spa every week. The dough came out perfect, can’t wait to make more next week!
Thanks for the recipe, trying it out tonight! I grew up on Billy Kidd’s, Venus, Poopsie’s, among others. Question: do you punch the proofing dough down at all or just let it rip for 6 hours?
Let her rip, it’ll get punched down when you first start to spread in pan. Let rest in pan for 15 min or so then spread all the way to edge
Best pizza ever!
I followed the recipe but found that to brown the underside of the crust I needed to almost double the baking time. I did use plenty of corn oil in the pans, (American Metalcraft T4012 12″ x 1″ Tin-Plated Stainless Steel Pizza Pans). The top of the pies looked done after 12 minutes but the bottom looked like raw dough.
Oven temperature was 500 degrees and did not put the pies in until preheated for an hour. Any ideas? ( I did put one pie higher in the oven and 1 lower than the middle after having the same issue placing pies in the middle; no difference). Also, once the dough is stretched out in the pan, how long should it rest – if at all – before adding the sauce and cheese?
Bill the bottom isn’t cooking because you are using the wrong pan. Order the Lloyds pan using the link above.
OK-thank you
I’m having an issue with the edges sticking badly. I oil the pan with corn oil but the edges will not release. Any thoughts? I’m using the loyds pans
I know it’s a late reply, but maybe it will help another person.
I have been using the same pan, 10″ version (T4010), with great success.
First question, did you season the pans when first purchased? They will naturally season after repeated use, but it is better to speed the process when they are new. Just wash them out with soap and water to remove any coatings that might come from the factory. Don’t scour them. Make sure they are completely dry, then coat them all over, inside and out, with some kind of vegetable oil. Canola works, some people swear by flax oil for this. Or lard. Corn and olive oil- not good for seasoning. Cook the pans in 400°F oven. 15-20 minutes. If you repeat this a few times, the pans will become dark and wonderful.
The browning of dough is also known as caramelization, which like it sounds actually has to do with simple sugar in the dough. That is part of the reason people add sugar to the dough recipe. Also yeast eats sugar, and produces CO2. The gas expands when heated, which causes the rise. If you wait too long during the dough proofing stage, aka fermentation, the yeast might consume most of the sugar, leaving not enough to turn brown when baked. In bread-baking, pale loaves are often a sign of too long fermentation stage. Not enough sugar left to caramelize. Food for thought?
Season the pans, dark pans attract heat better than shiny pans, and the seasoned coating is also more non-stick.
Made today and wow! Thank you! I drive 10-12 Lynwood pizzas home when I’ve visited family in N.E. I’ll continue to do so, AND when I’ve run out (like now since driving to visit family is not happening) this will tide me over for sure. I’ll make a couple of adjustments next time. Practice makes better!
Lynwood is great! Try to get it whenever I’m near my mother’s. These at home versions are pretty damn good!
I don’t have a have a bread mixer, would a cuisinart work, or can I knead it by hand ?
Nice recipe. Well described! Two recommendations – add grams to all ingrediants in dough and add baking percentages.
My cheese preference is a 2:1 mix of WI Brick Cheese and Motz
BAKERS% FACTOR GRAMS VOLUME INGREDIENT
100% 1 450 3.5 cups Flour
6.20% 0.062 28 2 tbsp Corn Oil
1.40% 0.014 6.4 2.25 tsp Active Yeast
1% 0.01 4.7 1.5 tsp Instant Yeast
1.40% 0.014 6.2 1.5 tsp Sugar
52% 0.52 236 1 cup Warm Water
1.90% 0.019 8.8 1.5 tsp Salt
6.20% 0.062 28.3 2 tbsp Melted Butter
2% 0.02 9.1 2 tsp Corn Oil for the pan
I added a line for instant yeast in case someone wants to use that instead of Active Dry.
Also, I would not use the factors and weights for small amount ingredients. Most kitchen scales are not accurate enough, maybe +/- 2 grams. To scale up or down, just use volume measurements like the teaspoon. If you double the recipe, then just double the volume measurements for the small ingredients.
Basically this is a 52% hydration dough, enriched with about 12% fat and 1.4% sugar.
Nice! Thank you Old Spa Fan!
YW, hope it helps someone. I did the original in excel, but lost the format pasting here.
You mention to double the oil for a crisper crust. Do you mean to double the oil in the dough mixture or double it when coating the pan? Looking forward to trying this!
In the dough, I’ve found that the more fats you add to the dough the crispier it gets
Lloyd’s pans get a bad rap for not being as non-stick as other 10″ pizza pans. Got any tips for taking the pizza out of the Lloyd’s in one piece? I’ve had some finished pizza slices that didn’t have crust because it hung on for dear life to the side of the Lloyd’s and its a sad thing. I do like that the Lloyd’s do cook the underside of the pie thoroughly, so I’m not looking to give up on them just yet.
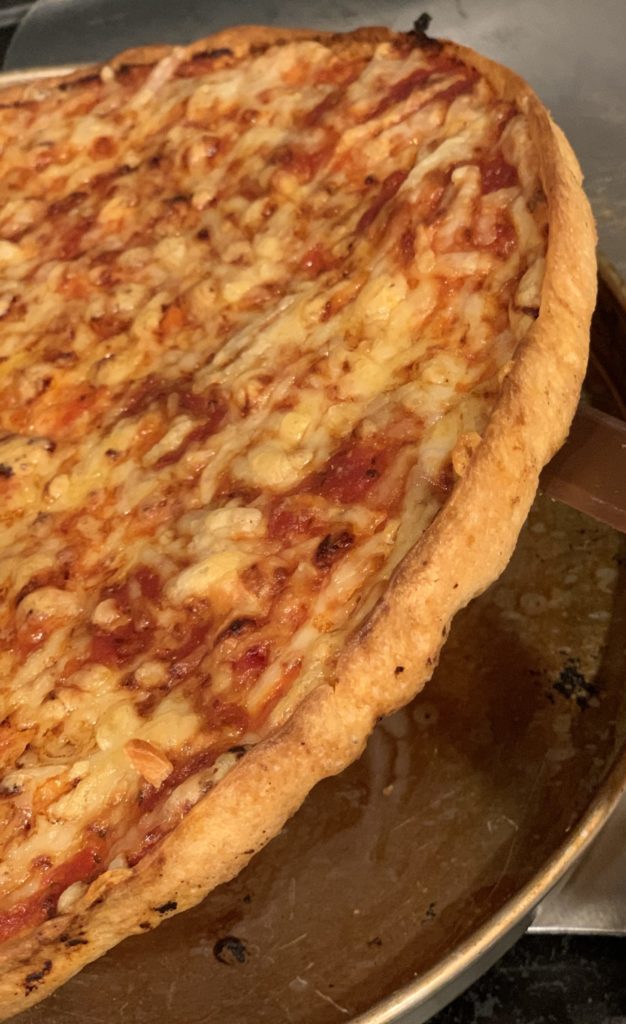
I had no problem getting my pizza out of the Lloyds pan. You have to use a generous amount of oil to get the crust to get that pan fried flavor. If you loosen the cheese from the edges with a knife or spatula, it should slip right out
Also don’t wash them, just wipe out with a paper towel
I don’t even grease my Lloyd pans anymore after about a dozen pizzas. I just use a butter knife or icing spatula to carefully loosen the crispy che de around the edges and the pizza lifts right out of the pan super easy. Never had one stick
I moved from The South Shore to Charleston South Carolina almost 2 years ago. Due to the Pandemic I haven’t back for a while. I missed Poopsies Pizza and this was the perfect fix. THANK YOU!!!!
I made this and let me tell you it was the best pizza ever! Taste just like something I would get from Cape cod, but now I can make it at home and it’s way cheaper! Thank you so much my family loves the pizzas I already made it three times.
Cannot get the flavor similar to the locals. What ratio of sharp cheddar to mozzarella do you recommend? Also, how much sauce? Any other tips are appreciated.
Do I use the same process if I’ll be using a pizza oven
Great Pizza. Been eating all my life and always played with recipes without success. Your crust is spot on and the fresh cheeses is the only way to make this pizza.
I do a little more with the sauce. agree don’t cook but I add fresh parsley, basil and garlic in the puree to make it a little more tasty. Don’t add the dried oregano. Just a personal touch
Wow, you are spot on with this. I haven’t even done proper sauce, have just used Rao’s marinara and I can already tell you seem to have the dough recipe nailed down. I love in Tampa now and I can make this at home and probably has e the best pizza in town. That needs to be a way to get the price down on these pans though LOL. Nevertheless I’ll be dropping 75 bucks on three more hahaha
Quick question. Is it ok to refrigerate the dough right away (for up to 48 hours) and then take it out for the long rise 6 hours before you’re gonna make the pizzas?
When u say crisper crust double the oil u mean into the dough correct?
How much dough would you use for a 12″ loyds pan weight wise? Wife ordered 2-12″ pans by accident.
12″ circle is about 1.4 times more area than 10″
This recipe calls for 6.5oz in 10″ pan, so 6.5 x 1.4=9.3 oz
I would probably go up a little, try 10oz in your 12″ pans.
I’m sure you’ve figured it out now but for anyone new:
This makes makes two dough balls, 266.5g each for a 12-inch pizza pan.
226.8 g water
2 tablespoons Corn Oil
2 tablespoons Melted Butter
450 grams All Purpose Flour or Bread Flour
1.5 teaspoons White Sugar
1.5 teaspoons Fine Sea Salt
2.25 teaspoons Active Yeast
Wish I could post a pic of my latest pizza.
Looks amazing, I want to try this but the home oven here sucks and barely hits 400. I have a Roccbox, but on the lowest setting it’s around 650 (I think) I know it’s well over 500. Has anyone cooked one of these in a similar propane oven? I’m thinking maybe pre-heat on the lowest setting until temp’s around 600f. Then turn the oven off and cook for about 13 minutes then turn the flame back on for the last couple of minutes to get some color/char on top while it finishes cooking
I’ve tested quite a few anywhere 8.8-9.5 oz and I gotta say 9 to 9.3 oz seems to be the sweet spot! Awsome recipe thanks
I’m wondering about freezing the extra dough. I don’t usually need to make 4 pizzas. Can it be frozen? At which stage? For how long? And then what do I do when I take it from the freezer. Thanks!!
Hi Verana,
I had success freezing different types of dough balls, but not this one. Generally you double-wrap in plastic, then double wrap in aluminum foil. They need to be used within a month or shorter period. I’ve found that beyond that the dough tastes a little off. For thawing, take them out of the freezer early in the day. Unwrap them an sprinkle a little flour top and bottom. Place on plate and it will be ready for pizza late afternoon.
Has anyone tried this with a no knead method?
Hi Andy,
IMHO, if the cast iron works stay with it! Just think, you’ve got a handle to grab! Good luck!
[…] make this at home, I scoured the internet for recipes and found this was the most local and used it for reference. I also used the look and the size of Boston’s Hot Box as my guide […]
[…] make this at home, I scoured the internet for recipes and found this was the most local and used it for reference. I also used the look and the size of Boston’s Hot Box as my guide in […]
[…] make this at home, I scoured the internet for recipes and: found this was the most local: and used it for reference. I also used the look and size of Boston’s Hot Box as my guide in […]
[…] do that at residence, I scoured the web for recipes and I discovered this was essentially the most native And I used it as a reference. I additionally used the form and dimension of a Boston hotbox as my […]
[…] make this at home, I scoured the internet for recipes and found this was the most local and used it for reference. I also used the look and the size of Boston’s Hot Box as my guide in […]
[…] make this at house, I scoured the web for recipes and discovered this was probably the most native and used it for reference. I additionally used the look and the dimensions of Boston’s […]
[…] make this at home, I scoured the internet for recipes and found this was the most local and used it for reference. I also used the look and the size of Boston’s Hot Box as my guide in […]
[…] make this at home, I scoured the internet for recipes and found this was the most local and used it for reference. I also used the look and the size of Boston’s Hot Box as my guide in […]
[…] make this at home, I scoured the internet for recipes and found this was the most local and used it for reference. I also used the look and the size of Boston’s Hot Box as my guide in […]
Can I just leave this dough covered at room temp until the next day? Or should I refrigerate it?
[…] can make pickle pizza with a homemade Neapolitan style dough, or one on a South Shore Bar Style pizza dough recipe (would be great with the red sauce and cheddar […]
WONDERFUL Post.thanks for share..more wait .. …
Hello! Thanks for the recipe! I grew up on Town Spa, and I don’t liver super far away now, but can’t find any good pizza in Worcester!
I’ve made your recipe many times now and it always works great! Wondering how important the BUTTER is as I would like to make it for someone with lactose intolerance?
Thanks!
I made for bar pizza. It had potential but also had issues. The cheese was amazing. I never would have thought that cheddar cheese mixed with mozzarella would be good. The sauce was alright. I used Contadina crush tomatoes but didn’t add anything to it. I did strain it though. The crust was the issue I had. It was really filling and didn’t have the right texture. I messed this part up. When I was mixing it, it was too sticky so I added a bunch more flour. I’m not sure but I think this was the issue. Also, I cooked it all for 12 minutes, but I think it could have used a few more minutes. I’m going to try this again soon.
I love this recipe! I’ve made versions for my 10 x 10-inch toaster oven pan, and 12 & 14 inch cutter pans and they all came out great. Thanks so much for this.
And Kelly D: anyone who mentions something like their killer NY pizza recipe and doesn’t post it or a link to it is….well now I know what the D in Kelly D stands for.
Thanks for all your efforts barpizzajm. I’m excited to try this recipe. Thanks also to the guy who posted the bakers percentage and lol to the guy ripping Kelly “D”. I’ve been making neopolitan style for years and even had my own brick pizza oven I built before I moved. After the move my wife bought me a Breville “Pizzaiolo” counter-top pizza oven. It wasn’t cheap bit it works extremely well. Gets hotter than you need and you can customize both the top and bottom heat. The top heat can even be aimed evenly or towards the edge. Love that thing.
“Outstanding” everyone in the family agrees. Thank you for sharing this recipe! I have been making, what I thought was the perfect pizza recipe, for about 10 years. We have options now:)
Great looking recipe, quick question:
After the 6+ hour rise, how much do you “punch” down the dough to release air bubbles and reshape into balls before forming into rounds? Usually when I make pizza I’ll very thoroughly punch down and squeeze the dough and reshape individual balls for another resting stage before rolling out. Just wondering if you do that here or avoid it as you mentioned ‘minimal kneading’ in the recipe notes.
Looking forward to making these today, thanks bro!
Got THE pan…12 inch. Followed the recipe. Went with 10 oz dough. Put the pan on the lower rack. 12 minutes. “One bite, everyone knows the rules”. 9.9! Thank you from Cali.
A friend of mine recommended ordering Cape Cod pizza off of Goldbelly. I had never heard of it or had anything like that before. Had never heard of “Bar Pizza”. Turned out that my wife preferred it to the frozen deliveries from Sally’s and Zuppardi’s (New Haven Pizza). Cape Cod wasn’t necessarily better but different (well, my wife thinks it’s better). Anyway, this recipe turned out really great. Now I can make bar pizza fresh. I had no idea that cheddar was mixed in with mozzarella and the combination really works. THANK YOU for putting this together! Big success!
I just made this pizza gluten free with the new King Arthur gluten free pizza flour and I could not tell the difference.
That’s awesome I will have to give it a try!
Thank you so much for this recipe! My husband’s family is from the Boston area and he’s always missing Town Spa Pizza’s bar pizza. We live in NC and hardly anyone here has even heard of bar pizza. This recipe is about as close to the real thing as I imagine you can get at home 🙂
Excited to try this! Any tips for preparing at altitude (7000′)? I’m a displaced Bostonian living at Lake Tahoe!
WOW! This is like the 5th time I have used this website for my SSBP, and every time I make these pizzas they get better and better. Last evening was the BEST, because of the Lloyd’s pans. The laced edges were out of this world!!! Thank you so much for this tutorial and the perfect step by step process in creating a masterpiece. This is A++++
Wish I could upload photos
I agree 100%. I could see you using up to 9.5 oz for a 10″ pizza. I struggled to get it to fit the 10″ pan and it was extremely thin.
Dough was easy to make, just not enough and made it a bit challenging.
Overall, not bad taste, definitely needs Corn Oil. I used Canola in this attempt and it lacked a little in flavor that the Corn Oil will provide.
I will adjust and report back.
Has anyone tried this on a gas grill recently? What was your temp and time, and how did it come out? Let us learn from your experiences….